
By: WellZenx Editorial Team
Published: January 24, 2026 (ET)
Updated: January 24, 2026 (ET)
Scope guardrails (what this covers)
This guide covers one specific scenario: your bedroom window has visible condensation on winter mornings, and you want a step-by-step way to diagnose whether it’s humidity, cold-glass dew point, or airflow/drafts, fix it in 48 hours, and prevent repeats over 30 days.
Out of scope (don’t use this guide for these)
- Active roof/window leaks that drip even when there’s no condensation
- Floodwater or sewage contamination
- Widespread visible mold growth or soft/rotting wood around the window (needs professional assessment)
30-Second Answer Card
You’ll usually fall into one of these types
- Type A — Humidity too high overnight: Normal winter cool glass + high indoor RH causes morning condensation.
- Type B — Glass/surface is too cold: Drafts, single-pane/older windows, or blocked airflow keeps the glass cold enough to hit the dew point.
- Type C — Moisture source in the bedroom: Humidifier, wet laundry, many plants, attached bathroom habits, or poor exhaust raises moisture load.
Do these 3 steps first (10 minutes total)
- Measure RH and temperature in two spots: near the window and at the bed level across the room.
Target: aim for 30–50% RH; for winter mornings, you may need the low end of that range. - Do a draft and airflow check: tissue test around the frame + confirm curtains/blinds aren’t trapping cold air.
- Start a 48-hour condensation reset: wipe/dry, increase airflow at the window, and lower overnight moisture load.
When to escalate
- 48 hours: condensation still forms heavily every morning → adjust RH lower and re-check drafts/airflow paths.
- 7 days: repeated pooling water on the sill or damp drywall/trim → investigate for hidden moisture damage or a window sealing issue.
- 30 days: visible mold, soft wood, or symptoms in high-risk occupants → consider professional moisture/mold evaluation.

10-Minute Diagnosis (simple tools, clear outcome)
Minimum tool kit
- Hygrometer/thermometer
- Flashlight
- Paper towels
- Disposable gloves
- Tissue or thin paper (draft test)
Optional: painter’s tape (mark problem spots), a small fan
10-minute self-check (most common → highest risk)
- Confirm it’s condensation, not a leak (2 minutes)
Wipe the glass and the sill dry at night. In the morning, check:
- Condensation: moisture is mainly on the glass, and it’s worst at the lower edge.
- Possible leak: moisture shows on drywall/trim in a repeating spot, or you see staining that doesn’t match glass condensation.
- Two-point RH check (2 minutes)
Measure RH and temperature:
- Point A: 1–2 feet from the window (not pressed against the glass)
- Point B: near the bed or bedroom center, same height
Write both readings down.
- Draft test at the window frame (2 minutes)
Hold a tissue near the window edges (sides/top/bottom).
- If it flutters, you likely have a draft that cools surfaces and increases condensation risk.
- Airflow trap check (2 minutes)
Look at curtains/blinds:
- If thick curtains touch the sill or fully seal the window area, they can trap cold air and worsen condensation behind the fabric.
- Sill and corner moisture clue check (2 minutes)
Use a flashlight to look for:
- Water pooling on the sill
- Dampness in corners
- Peeling paint or darkened trim
Mark any suspicious trim spots with tape and date them.
Diagnosis output (pick one)
- If RH is elevated across the bedroom (both points): likely Type A (humidity too high overnight).
- If RH is moderate but drafts/airflow traps exist and condensation is still heavy: likely Type B (glass too cold + airflow problem).
- If RH spikes mainly near the window or the room has clear moisture sources: likely Type C (moisture load in the bedroom).
Root Causes (what’s happening, and how to verify)
Cause 1: Dew point meets cold glass (Type A/B)
Why it happens: Overnight, bedroom air stays warm and humid from breathing and indoor moisture sources. If the window glass gets cold enough, water vapor condenses on it.
Verify: If condensation is consistently worst on the coldest mornings and fades later in the day, dew point is the driver.
Cause 2: Drafts cool the window area and feed condensation (Type B)
Why it happens: Air leaks around the frame bring cold outdoor air into the boundary layer near the glass. The glass stays colder, so condensation forms sooner.
Verify: Tissue test fluttering near edges, plus heavier condensation near specific frame sections.
Cause 3: Curtains/blinds trap cold air and keep glass colder (Type B)
Why it happens: When thick curtains seal the window pocket, warm room air can’t mix with the cold zone by the glass. The glass stays colder longer.
Verify: Condensation is worse behind curtains, and improves when you keep curtains slightly open overnight.
Cause 4: Overnight moisture load is higher than you think (Type C)
Why it happens: Humidifiers, wet laundry, many plants, or an attached bathroom with poor exhaust can raise RH enough to trigger morning condensation.
Verify: Turn off the humidifier for 48 hours, move wet items out, and compare RH and condensation.
Cause 5: Water sits on the sill and feeds mold/trim damage (Type A/B → escalation risk)
Why it happens: Even “normal” glass condensation becomes a problem if water pools on wood trim and stays wet for hours each day.
Verify: If the sill is wet every morning, you need a containment and dry-out habit immediately.

Fix Options (ranked, with tradeoffs)
Option 1: 48-hour condensation reset (fastest relief)
When to use: Any type—start here first.
Steps:
- Nightly wipe + morning wipe: keep the sill dry so water doesn’t soak trim.
- Increase window airflow: crack curtains 2–4 inches, open blinds slightly, or aim a small fan across the window area.
- Reduce overnight moisture load: pause humidifier, remove wet laundry, and avoid drying clothes in the bedroom.
- Re-measure RH morning and evening; log it.
Pros: Fast reduction in pooling water; clarifies what’s driving the problem.
Cons: If drafts or high RH persist, condensation returns.
Cost level: Low
Time: 2 days
Risk: Low
Good for: Most winter morning condensation.
Not for: Active leaks or rotting wood.
Option 2: Set a winter RH target that stops condensation (Type A)
When to use: RH is elevated across the bedroom, especially overnight.
Steps:
- Start with a realistic goal: keep RH under 50% and adjust downward if condensation persists.
- Lower in small steps: reduce target RH by ~5% every 24 hours until morning condensation stops (don’t chase “ultra-dry,” just “dry enough”).
- If you use a humidifier, treat it like a dial: lowest setting that keeps you comfortable without condensation.
Pros: Directly addresses dew point.
Cons: Too low RH can feel dry for some people; adjust gradually.
Cost level: Low–Med
Time: 2–7 days
Risk: Low
Good for: Condensation driven by elevated indoor humidity.
Not for: Draft-driven cold glass without RH issues.
Option 3: Draft sealing and “warm the glass zone” (Type B)
When to use: Tissue test shows drafts or condensation is worst at specific frame edges.
Steps:
- Add temporary draft control (seasonal): weatherstripping where the sash meets the frame; consider interior window film kits if appropriate.
- Keep airflow at the glass: avoid sealing curtains tight to the sill; keep vents unobstructed.
Pros: Reduces cold-air washing and improves comfort.
Cons: Some fixes are temporary; full window upgrades are bigger projects.
Cost level: Low–Med
Time: 30–120 minutes
Risk: Low
Good for: Drafty windows and cold-glass condensation.
Not for: Moisture sources that keep RH high.
Option 4: Moisture source control (Type C)
When to use: You have clear moisture sources in or near the bedroom.
Steps:
- Turn off bedroom humidifier for 48 hours and reassess.
- If there’s an attached bathroom: run the exhaust fan during showers and for 20 minutes after, then keep the bedroom door slightly open for equalization if safe/appropriate.
- Reduce plant clustering near the window; move wet items out.
Pros: Often fixes the “mystery” RH rise.
Cons: Requires habit changes.
Cost level: Low
Time: 1–7 days
Risk: Low
Good for: Condensation that tracks with humidifier use or bathroom routines.
Not for: Strong drafts that keep glass too cold.
Option 5: Long-term window solution (only if needed)
When to use: You’ve controlled RH and drafts, but condensation still heavily pools on cold mornings.
Steps:
- Consider storm windows, improved glazing, or professional evaluation of window performance and sealing.
Pros: Best long-term reduction.
Cons: Higher cost.
Cost level: High
Time: weeks
Risk: Low (hire qualified installers)
Thresholds used in this article
- Indoor RH target: 30–50% (ideal)
- Winter mornings: aim toward the lower end of that range if condensation persists
- Dry-out window for wet trim/sills: treat daily wetting as urgent; prevent water sitting for long periods
- Escalation: 48 hours no improvement → adjust RH/drafts; 7 days recurring pooling → investigate damage; 30 days mold/soft wood → pro help
7-Day Improvement Plan (daily tasks + targets)
Day 1: Baseline + start the 48-hour reset
Target: You have two-point RH numbers recorded; sill is kept dry; curtains are not sealing the window pocket.
Fail: Water pools heavily on the sill → increase wiping frequency and airflow immediately.
Day 2: RH adjustment (if needed)
Target: RH is trending down overnight; condensation looks lighter in the morning.
Fail: No change → reduce target RH by ~5% and keep moisture sources off.
Day 3: Draft focus
Target: Tissue test improves (less flutter), or you identify the worst draft edge.
Fail: Strong drafts remain → apply seasonal weatherstripping/film as appropriate.
Day 4: Airflow at the glass
Target: Condensation shifts from “wet sill” to “light fog” only, or disappears.
Fail: Condensation persists behind curtains → keep curtains cracked open overnight.
Day 5: Clean and dry surfaces (only after dry)
Target: Trim and sill are dry to the touch; no dampness trapped in corners.
Fail: Trim stays damp daily → treat as escalation risk and investigate deeper moisture trapping.
Day 6: Re-check corners and paint/trim condition
Target: No new peeling paint, darkened trim, or musty odor at the window.
Fail: New staining/soft spots → stop guessing and plan an inspection.
Day 7: Cold-morning recurrence test
Target: On the coldest morning this week, condensation is minimal and no sill pooling occurs.
Fail: Heavy condensation repeats → combine RH lowering + draft control, and consider long-term window solutions.
30-Day Relapse Prevention (weekly/monthly checklist)
Weekly
- Record RH in the bedroom at night and morning for one day each week.
- Quick tissue draft test at the window edges.
- Keep curtains from sealing the window pocket overnight.
Monthly
- Inspect window corners and sill for early damage (peeling paint, darkened trim, soft spots).
- Confirm bathroom exhaust habits (if attached bath): fan use during showers and 20 minutes after.
- Re-check humidifier settings (lowest comfortable setting that does not trigger condensation).
Seasonal
- First cold snap of the season: do a 2-day condensation reset and set your winter RH target early.
- If you use a humidifier: re-test condensation whenever you change its setting.
Odor Quick-Check (window condensation–related)
Musty smell at window trim
Check first: lower corners and sill
Likely cause: repeated wetting + damp wood/paint
Quick test: wipe dry at night, check if trim is damp again in morning
First actions: 48-hour reset + keep sill dry + increase airflow
Sour “wet fabric” smell
Check first: curtains and window-side bedding
Likely cause: fabric absorbing condensation moisture
Quick test: smell-test fabric near the bottom hem
First actions: wash/dry fully; keep curtains cracked open overnight
“Earthy” smell in the window pocket
Check first: behind closed curtains/blinds
Likely cause: trapped cold air + condensation + poor drying
Quick test: keep curtains open 2–4 inches overnight for 2 nights
First actions: airflow at glass + RH adjustment
Copy/Paste Templates
Bedroom Window Condensation Log (copy into Notes)
- Date (ET or local):
- Outdoor conditions (very cold / mild / windy):
- Bedroom RH% / Temp at night (Point B):
- Bedroom RH% / Temp in morning (Point B):
- RH% / Temp near window in morning (Point A):
- Condensation level (none / light fog / droplets / pooling on sill):
- Curtains overnight (sealed / cracked open / open):
- Humidifier used? (yes/no + setting):
- Bathroom/shower nearby? (yes/no + fan used):
- Actions taken (wipe/fan/weatherstrip):
- Result next morning:
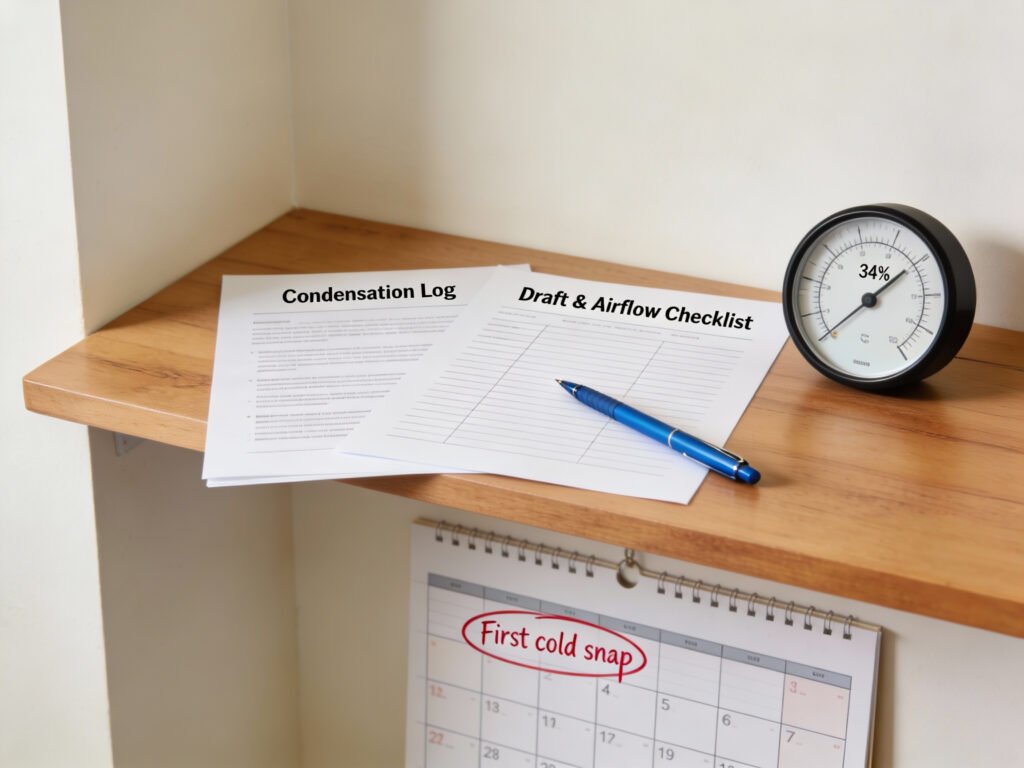
Draft & Airflow Checklist
- Tissue test flutter at edges? (left/right/top/bottom)
- Curtains touching sill? (yes/no)
- Blinds fully closed overnight? (yes/no)
- Vent blocked by furniture/curtains? (yes/no)
- Small fan used across window area? (yes/no)
Decision Tree (simple)
- Winter morning condensation → Measure RH in two spots
- If both points high → Type A → lower RH target + reduce moisture sources
- If RH moderate but drafts/curtains trap cold pocket → Type B → draft sealing + airflow at glass
- If humidifier/bathroom habits raise moisture → Type C → source control + re-test in 48 hours
Red Lines: Don’t DIY
- If wood is soft/rotting, paint is bubbling extensively, or mold keeps returning → stop and get professional evaluation.
- If anyone is high-risk (asthma, severe allergies, immunocompromised, elderly, infants) → reduce exposure and seek guidance.
- If moisture is near outlets/wiring at the window → shut off power to that area and call an electrician.
- If you suspect a true leak inside the wall (stains that grow, damp drywall, recurring wet spots unrelated to glass) → schedule a targeted inspection.
FAQ
- Is window condensation in winter normal?
Light condensation can happen, but daily pooling water on the sill is a problem because it can damage trim and encourage mold. - What’s the quickest way to reduce condensation tomorrow morning?
Keep the sill dry, crack curtains open, increase airflow at the glass, and reduce overnight moisture sources for 48 hours. - How do I know if it’s humidity or drafts?
Humidity shows up in your RH numbers across the room. Drafts show up in the tissue test and condensation concentrating near specific frame edges. - Should I run a humidifier in winter?
If you do, keep it at the lowest setting that’s comfortable and does not trigger condensation. - Why is it worse behind curtains?
Curtains can trap a cold pocket of air at the glass. The glass stays colder, so condensation forms more easily. - Can condensation cause mold?
If water repeatedly wets trim and stays damp, mold risk increases. Prevent pooling and ensure daily drying. - Do I need a dehumidifier for one bedroom?
If RH stays elevated and you can’t control moisture sources, targeted moisture removal can help—use numbers to decide. - When should I call a professional?
If you see soft wood, persistent mold, or repeated damp drywall/trim not explained by glass condensation.
Author Trust Block
Written by: WellZenx Editorial Team
Reviewed by: Home Environment Standards Editor (WellZenx)
Editorial standards: This article follows our Editorial Policy and fact-checking process.
Why trust this: We base recommendations on widely accepted guidance from sources such as the EPA/CDC and building-science best practices, and we prioritize measurable steps (RH readings, visible moisture clues, dry-out timelines).
Medical disclaimer: This content is for general education and does not replace medical advice.
Last updated: January 24, 2026
Related pages: Editorial Policy • Corrections • Medical Disclaimer • About WellZenx
Sources & Notes (Authority consensus vs Practical tips)
Authority sources (external references)
- EPA — Mold Course: Indoor humidity guidance (keep RH below 60%, ideally 30–50%). (US EPA)
- EPA — A Brief Guide to Mold, Moisture, and Your Home: Dry wet materials within 24–48 hours to reduce mold risk. (US EPA)
- CDC — Mold Cleanup Guidance: Emphasizes drying quickly, within 24–48 hours when possible. (CDC)
- OSHA — Mold / Moisture Safety Guidance: Clean and dry damp areas as soon as possible, preferably within 24–48 hours. (OSHA.gov)
- ASHRAE — Humidity Control Guidance: General humidity guidance for occupied spaces (often cited at or below 65%). (ASHRAE)
Practical tips (WellZenx workflow)
- Two-point RH check (near window vs bedroom center) to separate humidity-driven dew point from cold-surface issues.
- Tissue draft test + curtain airflow check to identify “cold pocket” causes.
- 7-day plan to force a clear decision: keep adjusting RH/airflow vs escalate to sealing or window upgrades.